
 |
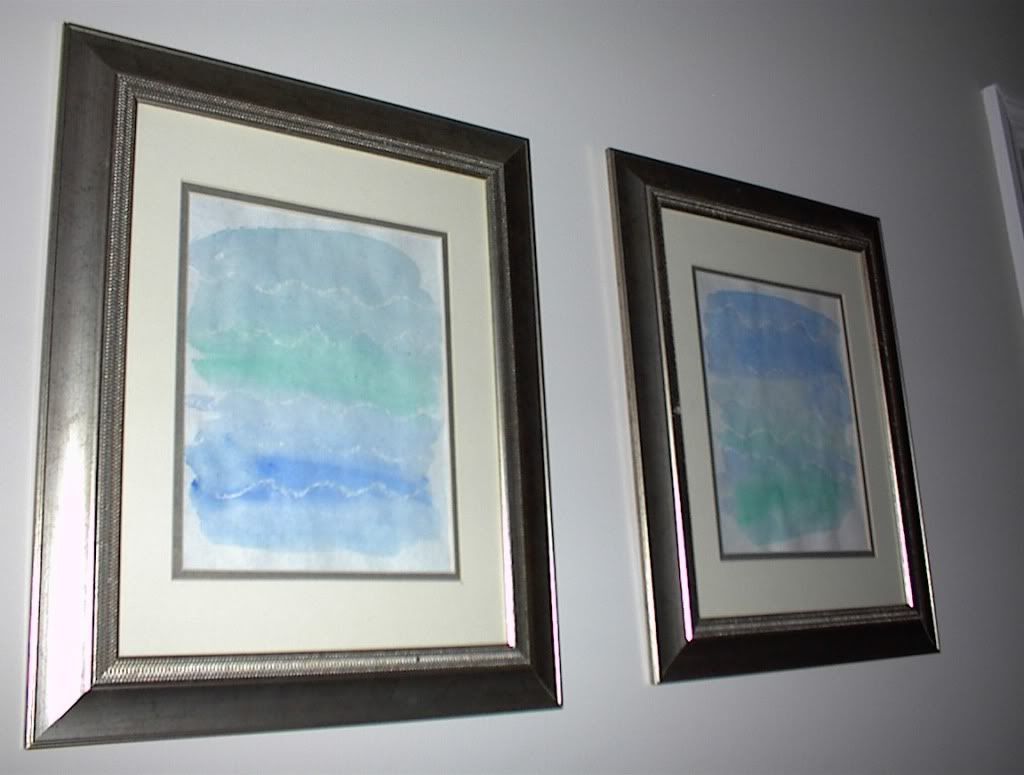
| Once framed, simple, DIY watercolors make a staged home look finished. |
It’s so exciting to have a home staging project in the wings that I couldn’t sleep last night. My mind wouldn’t stop rearranging condo furniture.
Put the twin bed on the diagonal or at right angles to the wall?
Face the love seat towards the fireplace or the water view?
Set a bookcase in the living room or the dining area?
Stage a home office in a corner of the kitchen or leave it open?
Do I have enough lamps? End tables? Vases? Pictures? It’s not that I’m worried. I just love the game of it.
Making Frugal DIY Art
Over the weekend I fooled around with making some artwork to hang. Here are the supplies I used and the steps I took:
- Supplies: two matching frames with mats and glass, six to eight sheets water color paper, white crayon or candle, set of children’s water colors with brush
- Measure the opening in the mats that go in the frames.
- Cut water color paper an inch larger all around than the mat opening.
- Draw wavy lines, reminiscent of ripples, horizontally across paper with crayon.
- Using the brush, mix water into green paint and squiggle paint over crayon marks.
- While green paint is still wet, do the same with blue paint.
- Let dry. Choose the best two. Tape all around to back of mat, and frame.
I hope you have the confidence to just fool around with some simple art supplies. I am sure you will find that you don't need to be an artist to create art for staging your home to sell.


No comments:
Post a Comment