
 |
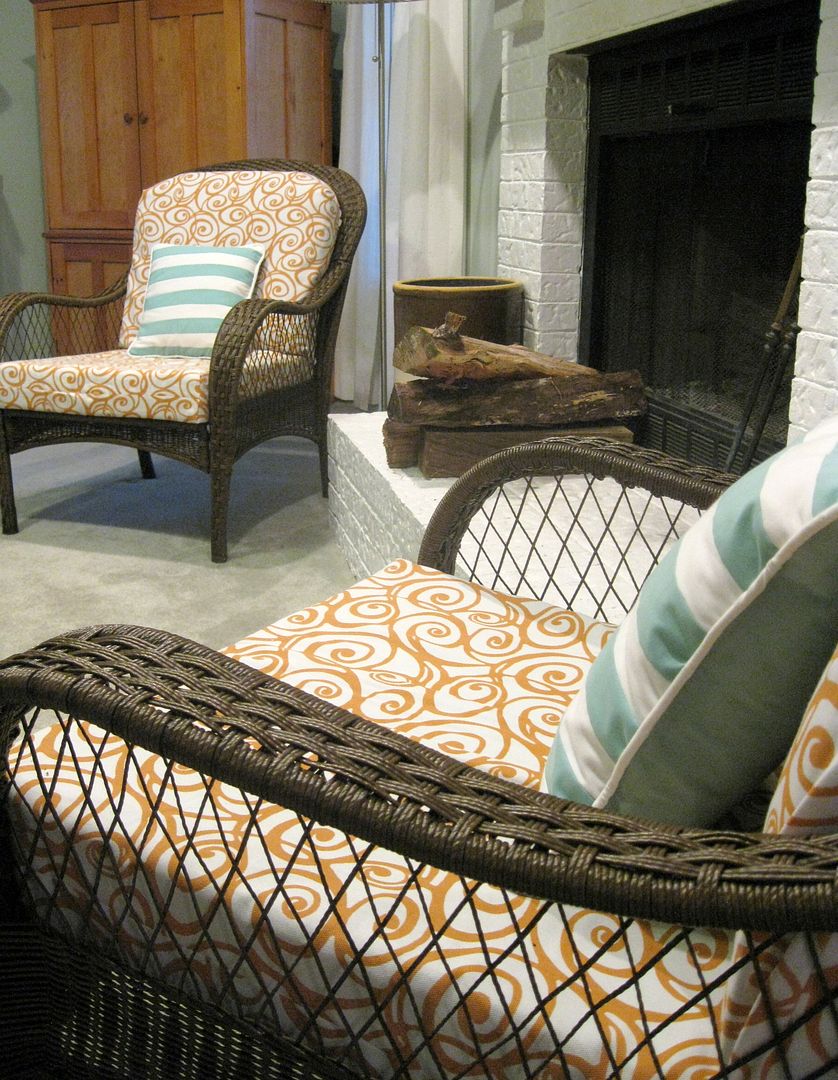
| New fabric revived my old chairs. |
My two wicker chairs desperately needed updating. I was tired of their dreary, stiff, brownish-red slipcovers and uncomfortable seats.
I wanted something light and lively, and I already owned the perfect fabric. It was the same yardage I used in my tutorial to construct a fake bed and bedskirt for bedroom staging.
I'm not adverse to making mistakes, as long as I can learn from them. What I learned when I sewed these slips was "Think ahead," and, "Take your time."
You would think I already knew these rules! What can I say except, "Impatience took over my mind."
The cushions look okay, but they could look better. Specifically, here's what I did wrong.
Mistake One. Since each seat cushion was square, I cut out two squares of fabric for each, sewed these together, then squared off the corners. I didn't realize that the front seam on the seat didn't have to be a seam at all. I could have simply wrapped the yardage around the front of the foam cushion, and sewn three seams.
The best upholstery and slipcovers have matched patterns where seams join. I could have had this seamless, custom look, but I blew it by not thinking ahead.
Mistake Number Two. By cutting out just two panels of fabric and placing the seam midway on the sides of the cushion instead of on the edges, my slips look like they might have been purchased ready-made instead of custom-fitted. Had I cut side pieces, the look would have been classier.
Mistake Number Three. Another oops I made was to not wrap the foam cushion in a layer of synthetic batting. Batting softens the hard edge look of a square of foam. I've used this method before to make cushions that look both more professional and more comfortable.

Mistake Number Four. Rushing also meant that I did not take time to add piping. Skipping the steps that would require me to buy or make piping and sew it into the seams meant forgoing a custom look.
Whether it matches or contrasts, piping always makes any slipcover, pillow, cushion, or upholstery look crisp, finished, and high end.
The beautiful chair pictured on the left was expertly and lovingly upholstered by Little Miss Penny Wenny, and she blogged about it on her site last April.
Notice that the chevron pattern matches as it rolls over the upholstery. Notice that she's incorporated self-piping along the seam lines, some of it double. Miss Penny Wenny really knows her stuff!
Although this chair is upholstered, not slipcovered, the same rules apply. Attention to details make a difference. Follow her example, not mine.
Takeaway: I hope next time I sew slipcovers, I'll take my time and think ahead. Meanwhile, I still like the new look my wicker chairs have. And, hey, it takes humility to admit your mistakes in blogland. To my credit, I did replace the worn-out fiberfill stuffing with new foam cushions. Much more comfortable!
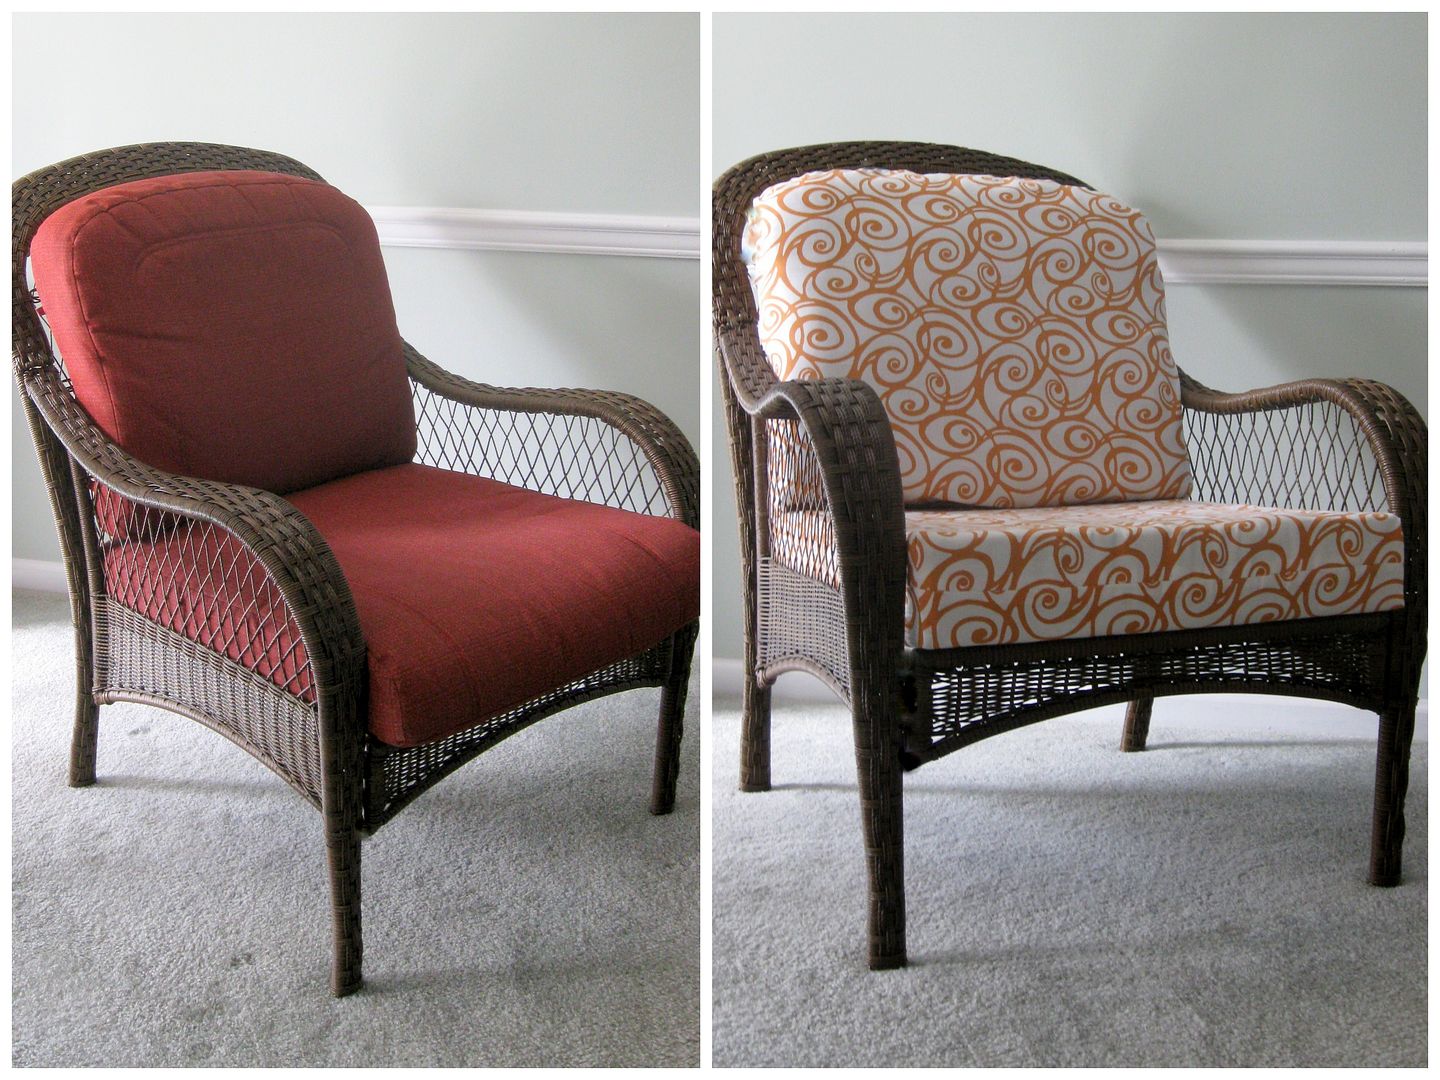 |
| The red fabric had lived its best days, but I love my orange swirly fabric. |
Need help staging your home on the market? I can help you decide what to spruce up, what to clean, how to get organized, what to get rid of, how to update and refresh what you own, and so much more. Download my ebook, DIY Home Staging Tips to Sell Your Home Fast and For Top Dollar.
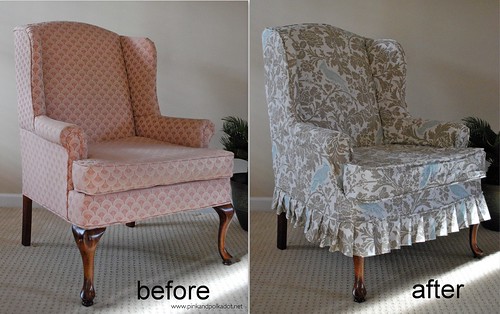 |
| Here's an example of the transformations Kristi creates. Notice the self piping and cute pleats. |


No comments:
Post a Comment