
“How do I decorate my home during the holidays?” That's one of the most common questions home sellers ask at this time of year.
The simple answer is, “It depends.” It depends on whether you usually celebrate Christmas or Hanukkah in a traditional way.
It depends on whether children live in your home, and how nostalgic you are.
It depends on how uncluttered you want your home to look.
It depends on what your personal taste is, how much space is available in your home, how big your budget is, and what your schedule looks like.
One thing is for sure: there’s always room and some money for a tabletop tree. It’s seasonal, but ecumenical. It’s decorative, long-lasting, and fashionable. No matter what style your home reflects, you’re bound to be able to buy or DIY a small artificial tree for the holiday season.
I’m talking about the tabletop trees that measure less than 18 inches – cute little things that bring a touch of color and maybe even humor to the smallest space. Spaces like a bath vanity, a foyer table, a bookcase, mantel or nightstand.
I went a little crazy this year making tabletop trees for gifts, for clients, and for myself. Along the way I learned a few what not-to-dos, and discovered some quick and cheap ways to make them look special.
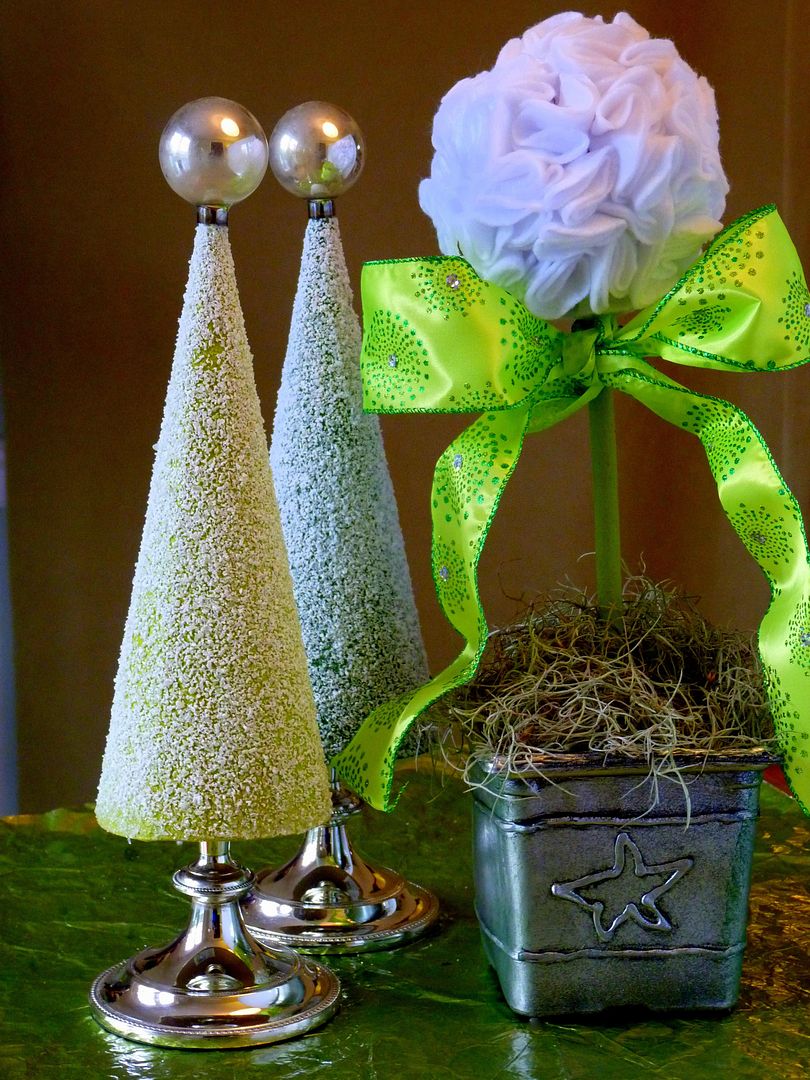
The two conical trees pictured above are the same Epsom salt-covered ones I used in my tabletop display. I just popped a silver ornament on top of each, and set them on matched silver candlesticks for a different look. The felt flower topiary in the fake pewter pot is leftover from the tutorial I did last Christmas. It stored well. I just freshened it with some new spaghnum moss, and a bow in my favorite holiday color.
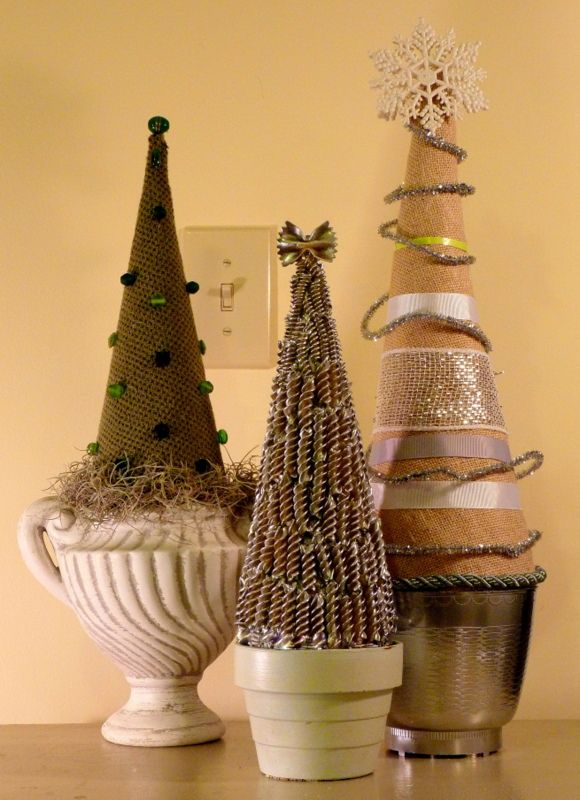 |
| A dish towel with beads glued on, some pasta painted silver, and a burlap cone dressed in ribbons and pipe cleaners -- each one makes a different kind of miniature Christmas tree. And not one of them was difficult to make. It fact, it was fast and fun! |
Make Similar Shapes
If you’re going to be making more than one tree, I suggest making all your trees somewhat similar. You have enough to do without starting from zero with each DIY project. I used a cone shape for most of my trees. You can buy Styrofoam cones, floral foam cones, or paper mache cones. You can also fashion light weight cones from cardboard or poster board.
Get Inspired
Let your materials inspire you. As usual, I gathered up odds and ends and craft supplies from around my house that I wanted to use or recycle. Having a stash at your fingertips prompts creativity. Look for fabrics, jewelry, natural objects, ornaments, paint, or paper that speaks to you and fits with your décor.
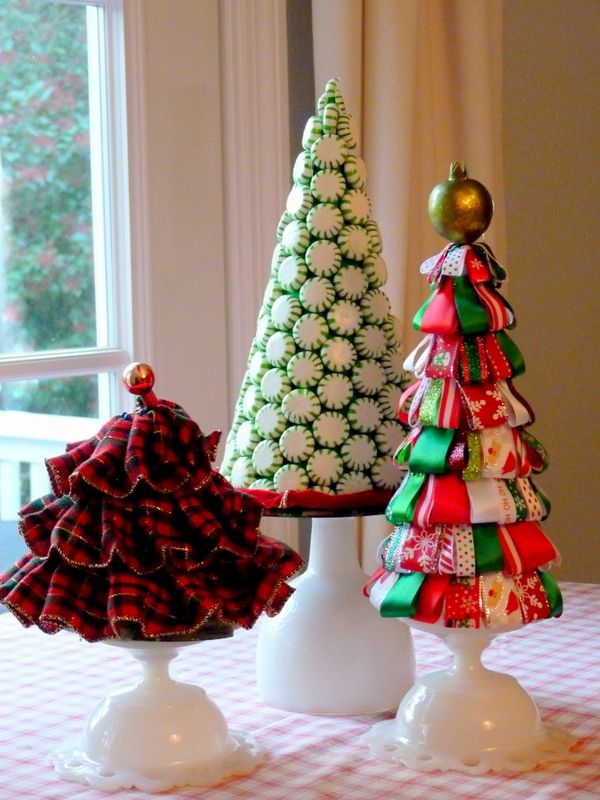 |
| Pedestals and bases make a big difference. Try different styles until you find the right one for your tree. I liked the look of milk glass under my one candy and two ribbon trees. |
Create Contrast
You can mix it up so each tree is unique and interesting. Put a funky burlap tree in a shiny silver planter. Add a glitzy snowflake to the top of a humble Kraft paper tree. Place new with old, rough with smooth, glossy with dull, black with white.
Think Sturdy
If you want your trees to last over time, so you can bring them out again in years ahead, make them strong enough to be packed away. That means nothing flimsy, and nothing perishable that might invite mold or animals. My pasta tree and candy tree are “annuals,” rather than perennials.
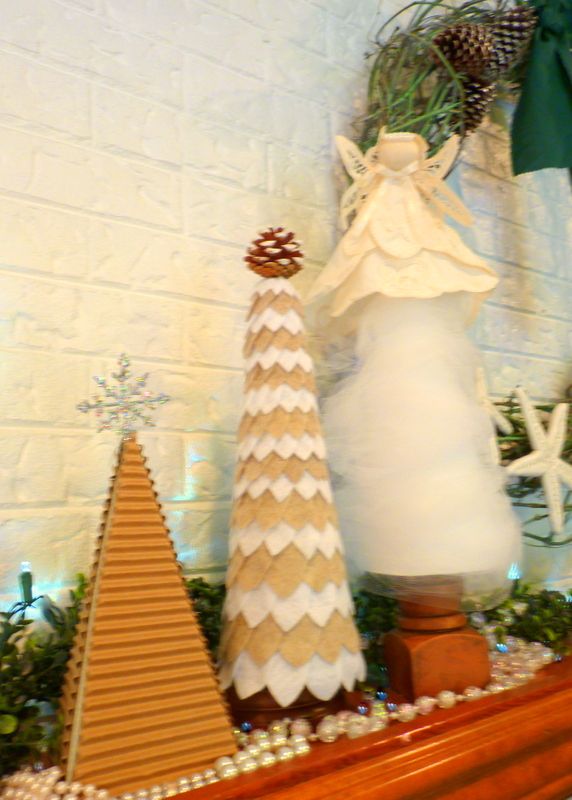 |
| Corrugated cardboard (one layer peeled away), felt, and tulle, are the makings for little trees. Trees this size make easy work of decorating a mantel, even a narrow one, for the holidays. |
Economize
Look for ways to save money by substituting less pricey materials for what you’d purchase finished at craft stores. I found I could make a paper mache cone by wrapping a store-bought one with aluminum foil and adding layers of newsprint smeared well with school glue. Once it’s hardened, you can slip the $4 cone out, so you have an extra cone (or more if you want to repeat the process).
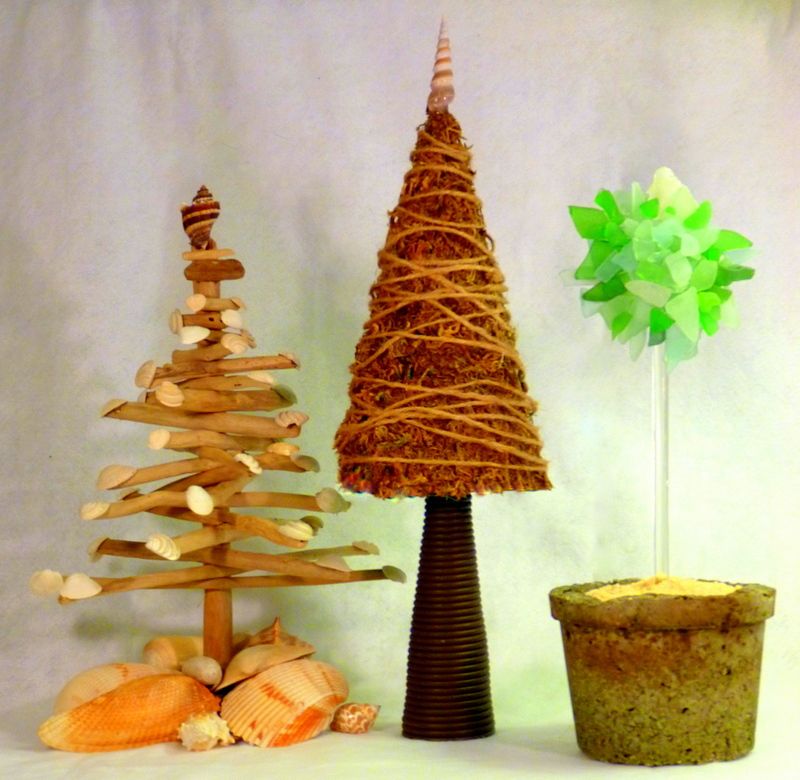 |
| The driftwood tree is just sticks, glue and shells. The middle tree is sheet moss I glued to a cardboard cone cut from half a sheet of poster board, set on a metal candlestick. And the topiary is sea glass glued to a plastic salad spoon stuck in sand-filled hypertufa pot. |
Last year topiaries captured my heart. This year, I am infatuated with tabletop trees. And I’m not the only one. I’m seeing them in all the stores, in magazines, online, and on Pinterest. On my own Pinterest Tabletop Trees Board, I’ve already pinned over 45 of my favorites, and I know I’ll add more. Are you smitten with these little trees? Have you made one?
Let Me Help You Stage
Do you have a home on the market? Have you staged it? No matter where you live or what your home is like, it’s already staged, vacant or inhabited, clean or cluttered – it’s staged! You might as well stage it to sell! Download my $5 eBook, DIY Home Staging Tips to Sell Your Home Fast and for Top Dollar, so you can quickly and thriftily improve the marketability of your home for sale.


No comments:
Post a Comment