
 |
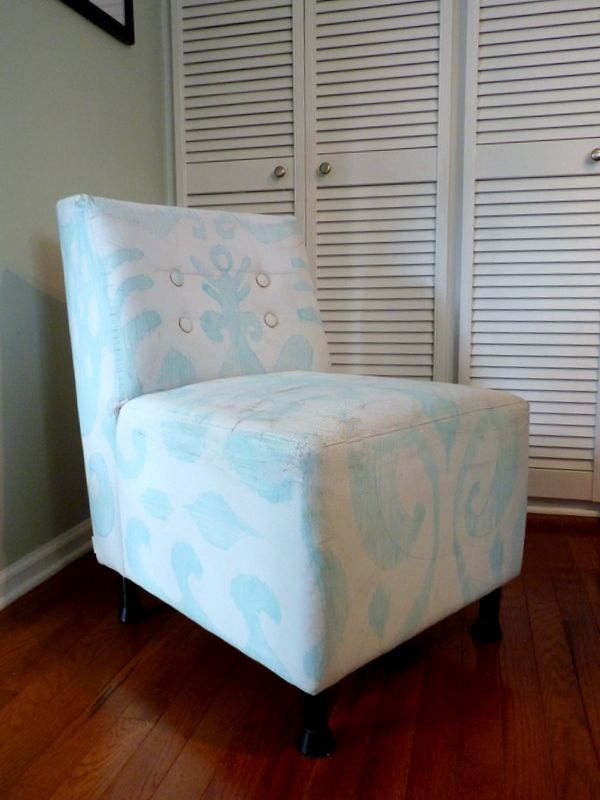
| I took one ugly chair and gave it six different looks. This is one. |
I know you can buy fabric paints, but I wanted to see if you could use ordinary latex wall paint to change an ugly chair into something suitable for staging.
The answer is a definite yes.
Can you use this method to overhaul all the upholstered furniture in your family room and give it another five years of daily service? No.
But it is a quick, simple and thrifty way to rescue furniture that is the wrong color, mismatched, stained, or faded, into furniture that looks fresh and clean enough for a staged room that doesn’t get much use. We're not talking heirloom quality here. We're talking home staging.
Here is what I started with. A friend was planning to haul this chair to the landfill, when I intercepted it for my test. It was a sad-looking tawny brown, kind of like a shy puppy at the dog pound.
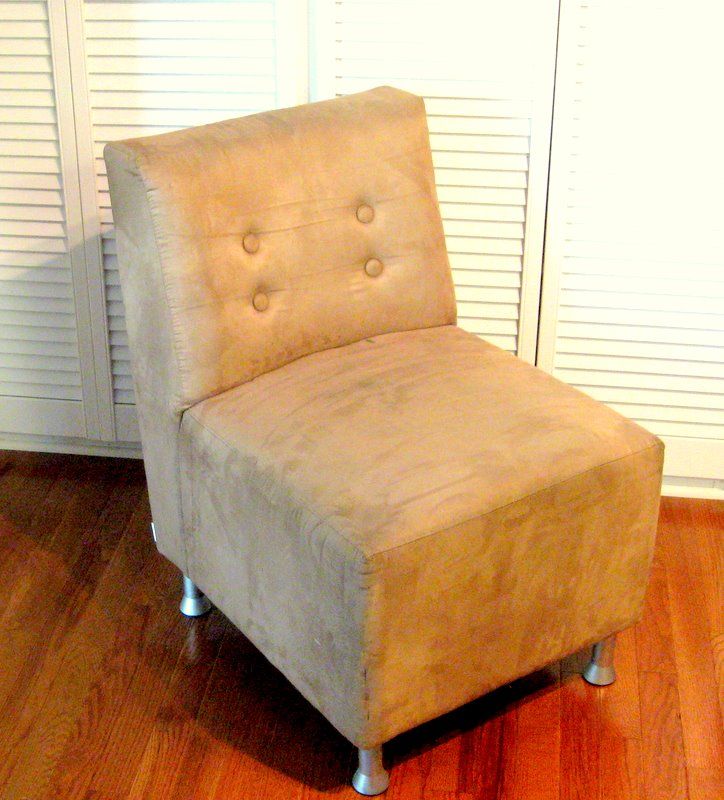 |
| Microfiber upholstery is okay, but this chair wanted a facelift. |
My first step was to brush the surface with a stiff bristle brush to remove loose dirt. You could do this outside, or inside with a vacuum.
I knew that stains could bleed through the latex paint, so I examined the fabric for marks made by crayons, marking pens, grease, oil, or wax. My chair was stain-free, but if you see stains, give those nasty spots a quick hit with a spray of Kilz oil-based primer.
I always start a painting project upside down. I flipped the chair over and painted the bottom edge. I used a light blue flat paint, and a two-inch latex brush. I didn't thin the paint, or add fabric medium to make the dried paint more flexible.
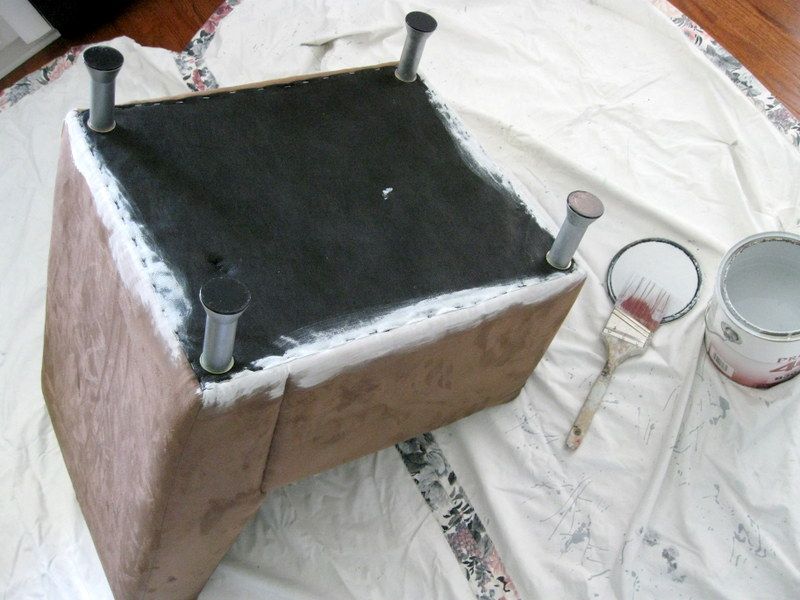 |
| It's easier and more efficient to start painting the chair upside down. |
 |
| The first coat dries unevenly, but it's just a primer. |
I didn’t like the cheap metal legs on this chair, so I painted recycled tin cans and slipped them over the legs. Then I wrapped the chair’s four decorative buttons in a slightly darker blue taffeta. I didn’t remove them, just laid a circle of fabric over the top of the button, and tucked it snug around the edges.
 |
| I don't think anyone would guess that this pretty chair is painted microsuede. |
I actually lived with this chair as a side chair in my office/studio for a few months, so it did get some sitting on and feet-propping. The fabric doesn’t flex as much as it would with fabric paint, but it didn’t feel really stiff either. In fact, it felt smooth and pliable, like leather. It helped that my chair covering was snug, not floppy like some microfiber upholstery.
Phase two of the experiment was to paint a design on the fabric. I used a light blue highligher pen to free hand draw the design onto the painted fabric. It would have been easier to have selected a more free form design, but I really wanted the illusion of ikat. You can see the results of that project in the top photo.
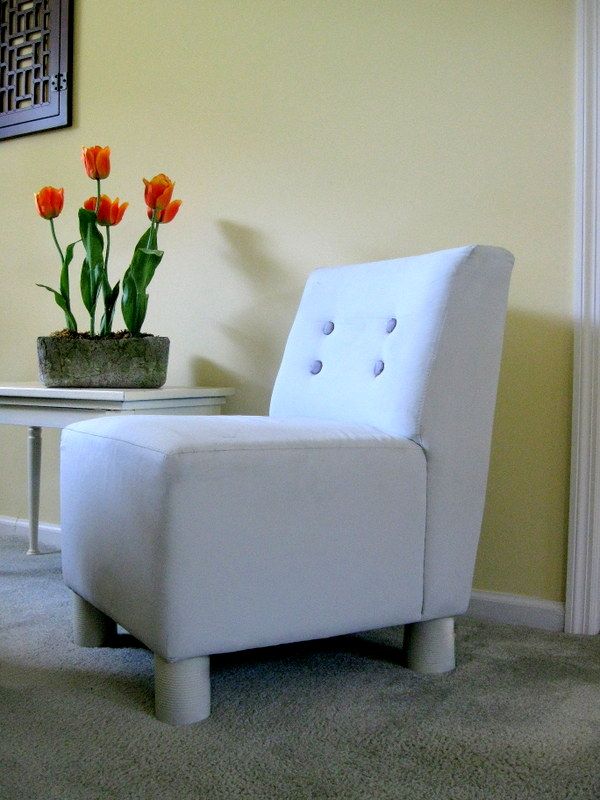
Next, I painted the chair all white and ran washi tape around the seams to suggest a contrasting piping. I unscrewed the legs, painted them green and replaced them. It did take two coats of a brushed-on white primer to cover the highlighter, but the fabric still wasn't buckling or cracking under all that paint.
Then, I converted the legs to bun feet by covering them with burlap puffed up with some pillow stuffing. I removed the washi tape, and simply draped a scarf over the chair. You can't get any simpler than that, yet I really liked the look. I pinned the scarf at the corners with white dressmaker pins that were hardly visible.
Next, I painted the chair all white and ran washi tape around the seams to suggest a contrasting piping. I unscrewed the legs, painted them green and replaced them. It did take two coats of a brushed-on white primer to cover the highlighter, but the fabric still wasn't buckling or cracking under all that paint.
 |
| When I took the washi tape-trimmed chair outside for its photo, my friendly backyard ginko wanted to get in on the session. |
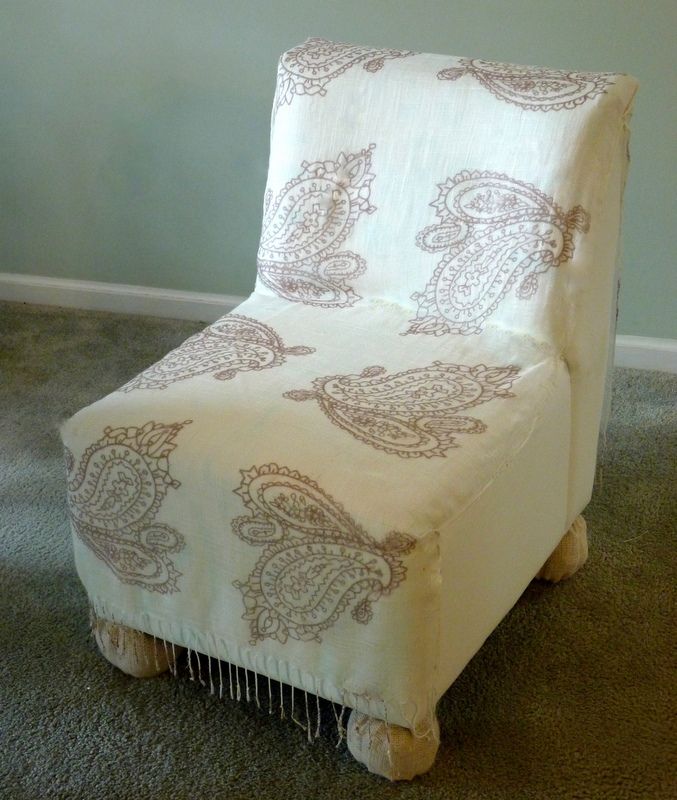 |
| I liked the ethnic feel of this version. But if it would look wrinkled soon if people sat on it, always a possibility during a showing. |
I wasn't ready to give up on the chair yet. As an additional test, I covered the seams with some white plastic cording designed for making piping on outdoor cushions. I just hot glued it on. This piping definitely bumped up the style factor, and made it look more like a white leather chair.
 |
| I made cones of vinyl grasscloth-style wallpaper to slip over the metal legs of the chair. It's amazing what a glue gun and paint will do! |
Since I was having so much fun, I decided to print an all-over design, using a cork from a wine bottle as a stamp. I dipped it in black paint and pounced the circle design all over the chair. I did not fuss with precision placement, but printed in a fairly random pattern. It took about 30 minutes.
I’m pleased with how easy and frugal it was to transform a plain microfabric side chair into a handsome addition to a staged room. I think this technique holds possibilities for staging vacant homes or seldom-used rooms, rescuing furniture you own but don’t like, or second hand furniture you’ve bought for a song. If you have some microsuede upholstered pieces that are the wrong color, or just need some refreshing for staging, paint them!
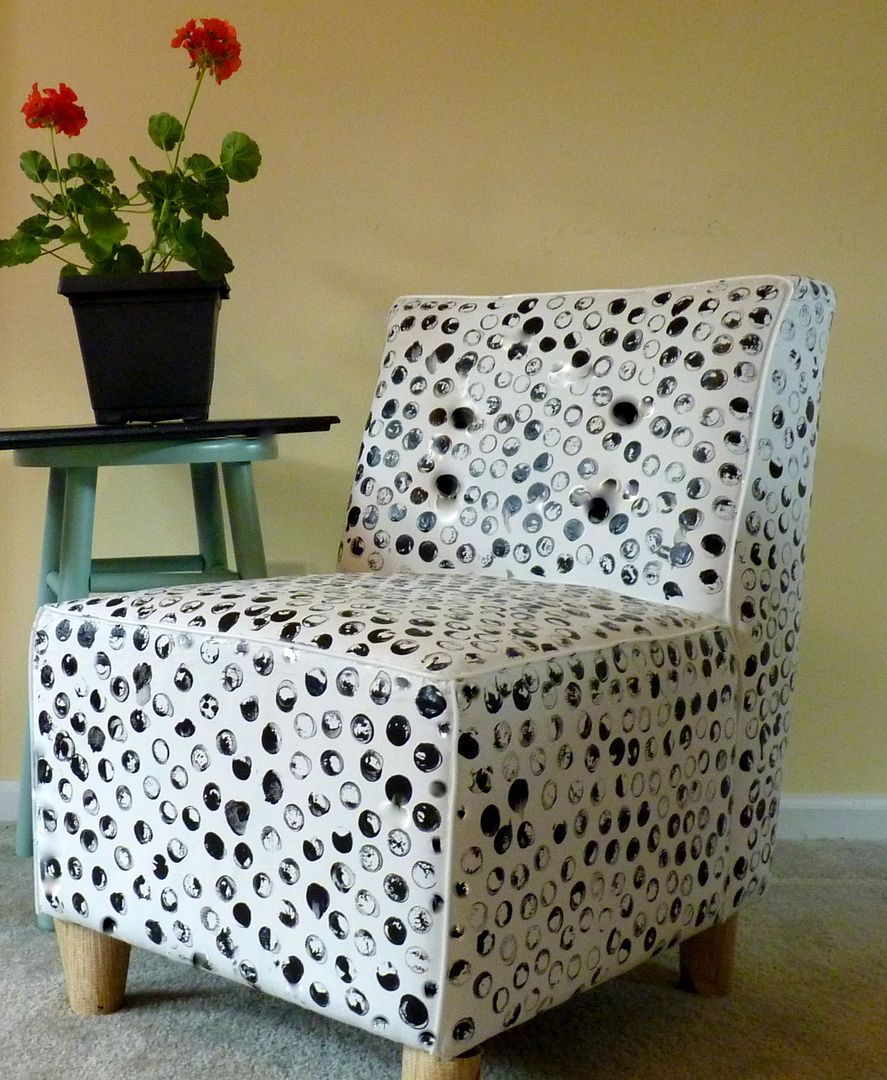 |
| I might like this version the best. It's the most decorative, and black and white patterns in fashion and furnishings are trending right now. |
Are you looking for other attractive and thrifty ways to stage your home for sale? Download my $5 eBook, DIY Home Staging Tips to Sell Your Home Fast and for Top Dollar, and you’ll have all the tips and formulas you need to make your home look better to home buyers.


No comments:
Post a Comment