
 |
| Fresh paint turns buyers on. |
Painting a room is one of the easiest, cheapest ways to get a home ready for selling. As a professional painter, homeowner and landlady, I’ve painted literally hundreds of rooms.
That’s why it irks me to see people on TV, whether they are hosts of their own design show, DIY remodelers on a reality series, or models in painting commercials, paint the wrong way.
If you follow their lead, if you paint the way TV teaches you, you’re wasting time and money and getting sloppy results.
If you follow their lead, if you paint the way TV teaches you, you’re wasting time and money and getting sloppy results.
Prep is Everything
No one on TV mentions preparing a wall for paint. Even if the room has been painted recently and looks smooth, sanding all the walls with a pole sander knocks down any dust and lumps. Sanding gets the surface ready to accept new paint. Patch and sand and then spot prime as needed.
If you made lots of repairs or are changing color, a primer is a good intermediate step. Talk to the experts at your paint store about covering the old color with the new one you are buying. Careful prep is what makes the difference between a pro job and an amateurish attempt.
Get a Handle on It
Once in a while, a television camera catches a glimpse of a professional painter working in the background. Chances are the pro is doing it right. He’ll be using an extension handle on the roller frame. Meanwhile, the show's host starts rolling paint in the middle of a wall, holding the stubby roller handle. Oh, my aching wrist!
Please don’t roll paint onto a wall holding just the paint roller handle. Give your wrist, arm, back, and shoulder a break, and use your whole body to support the work of rolling. Face the wall, stand with feet apart, one foot slightly in front of the other and keep your back straight when rolling.
Even a broom handle screws into a paint roller handle. If you're painting a room so small there's no room for a simple extension stick, it’s okay to hold the roller. Otherwise, stick with a stick.
 |
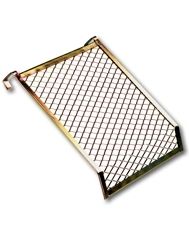
| Once you use a handle, a screen and a 5-gallon bucket, you'll never go back to dinky trays. |
Keep a Clean Can
I frequently see blogging tutorials and television remodelers dipping a brush into a gallon paint can. Do not paint out of the original paint can.
Work out of a clean, empty 1-gallon can or work bucket. That way, when you’re done painting, you can return the unused paint portion and you'll have a clean can with a clean lip and a clean label to store the leftover paint in, clearly indicating the brand, color, finish, and any other specs that will come in handy when it’s touch-up time.
The Truth About Tape
I laugh when I see televised rooms trimmed with blue tape all around all the windows and doors. This is usually an unnecessary step. Wake up, people. The 3-M company loves bloggers to endorse these products! You're wasting your time and money.
Spend your money instead on good quality paint and you won’t be dripping and splattering. Baseboards might be the exception if your paint is likely to drip on them.
A good angled 2-inch paintbrush and a steady hand is faster. Practice painting a straight line in an inconspicuous area. Use long strokes and keep your arm partially extended instead of putting your face up close and dab-dab-dabbing. Cut in the room first, and then roll walls. Make sure you cut in wide enough, especially around the top of the wall, where it meets the ceiling. Get a good 4- or 5-inch band of paint up there, so your roller doesn’t get paint on the ceiling.
My Best Rolling Tips
Instead of pouring your paint into one of those silly flat trays, pour it into a 5-gallon bucket with a painting grid in it. This is the professional method that saves bending over. And there's less chance of kicking over your paint.
Load your roller generously and remove excess using the grid. Start by rolling the wall in a "W" or "M" motion, then use long, up and down strokes. Do not lift the roller from the wall. Start your first stroke with an upward motion, because if you roll down on the first stroke, the paint can puddle under the roller and run down the wall.
If your roller drips or smears instead of rolling across the surface, you’ve put too much paint on it. If it leaves skips or you have to press to get the paint to apply evenly, you’ve put on too little.
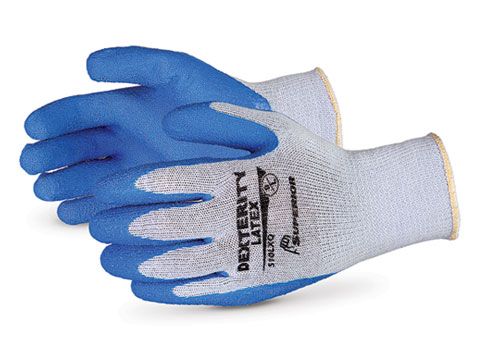 |
| My favorite gloves are breathable, but palm-protected, like these nitrile-coated ones. |
Dress for Success
TV stars paint in high heels and cute dresses. You, on the other hand, need to dress right for the work.
Keep an outfit just for painting. I recommend pants with pockets so you can wear all your helpful tools. Consider buying a pair of painter's overalls if you do much painting. Keeping tools on your person saves steps and saves time. It’s frustrating to have to stop and hunt for a damp rag or your square of sandpaper. Keep a rag and an old brush for dusting in your back pocket, a 5-in-1 tool in another pocket, and sandpaper in another pocket.
Wear closed-toe, comfortable shoes that will protect your feet and keep them happy all day. Your old sneakers might be a good choice. You’re bound to get some paint on your shoes. You want reliable support and safety, so going barefoot is not an option.
Wear cotton, latex, neoprene, or nutrile gloves that will keep paint off your hands and save cleanup time.
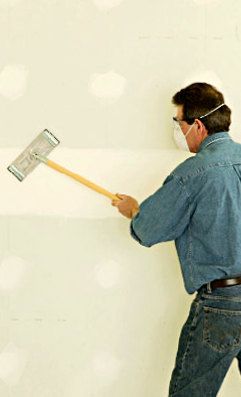 |
| Pole sanding. A dust mask like this will protect you from dust, but not from paint solvent vapors. |
Dropcloth Facts
Don’t use plastic dropcloths. I know it’s fashionable for DIYers to recycle shower curtains or unroll yards of plastic sheeting, but almost anything is better than plastic for a dropcloth. Why? Because paint doesn't dry quickly on plastic, and you can easily track it around. Instead, use a purchased canvas dropcloth. It doesn’t have to be large. A 4- x 15-foot "hall runner" dropcloth is versatile, economical, washable, and will last for years.
Saving money? Then old rugs or carpet scraps, cardboard, or bed sheets (two or three layers thick) will usually provide all the protection you need. While painting, pay attention to what you are doing, and check your soles before stepping off the drop cloth onto carpeting or flooring.
But wait. There’s More.
Now that I have sounded off on one of my pet peeves – common painting mistakes – I hope I’ve enlightened you about the best way to add new paint to your walls. You are welcome!
If choosing a paint color is difficult for you, I have written posts about paint colors and how to choose them.
Please download my eBook, DIY Home Staging Tips to Sell Your Fast and for Top Dollar, so I can give you more advice on staging your own home for sale.
Top Photo: Apartment Therapy
If choosing a paint color is difficult for you, I have written posts about paint colors and how to choose them.
Please download my eBook, DIY Home Staging Tips to Sell Your Fast and for Top Dollar, so I can give you more advice on staging your own home for sale.
Top Photo: Apartment Therapy


No comments:
Post a Comment